
chicken fingers recipe baked

The Best chicken fingers recipe baked
I’ve been making chicken fingers for years—well, since my kids were little and I realized they’d eat anything if it was coated in something crunchy and golden. There’s something about the simple, foolproof method of dredging chicken tenders in a mix of flour and seasoning, then baking them until they’re crispy on the outside and tender on the inside. It’s not just a comfort food; it’s a staple that never fails to bring smiles to faces, whether it’s a weeknight dinner or a special occasion like a game day or a family gathering. My kids—now grown but still picky eaters—used to beg for seconds, and honestly, I don’t blame them. The combination of the mild, slightly sweet breading and the juicy chicken inside is just perfect. Plus, it’s easy to customize. You can keep it light with whole wheat flour and a sprinkle of herbs, or go classic with a little extra salt and pepper. It’s adaptable, which is why I love it.
I also appreciate how this recipe can be a healthy twist on something indulgent. Instead of frying, baking keeps the calories in check while still delivering that satisfying crunch. I’ve even found ways to make it even better by adding a touch of honey or a dash of garlic powder to the breading for extra flavor without overpowering the natural taste of the chicken. It’s a great way to feed a crowd without spending hours in the kitchen, and the kids always love helping with the shaping and tossing—they think it’s fun, and honestly, it keeps them engaged while you prep. It’s that kind of recipe that makes me feel like I’m doing something good for my family while still treating them to something delicious. Plus, it’s a no-fuss meal that works for all ages, from picky eaters to adults who just want something easy and tasty.
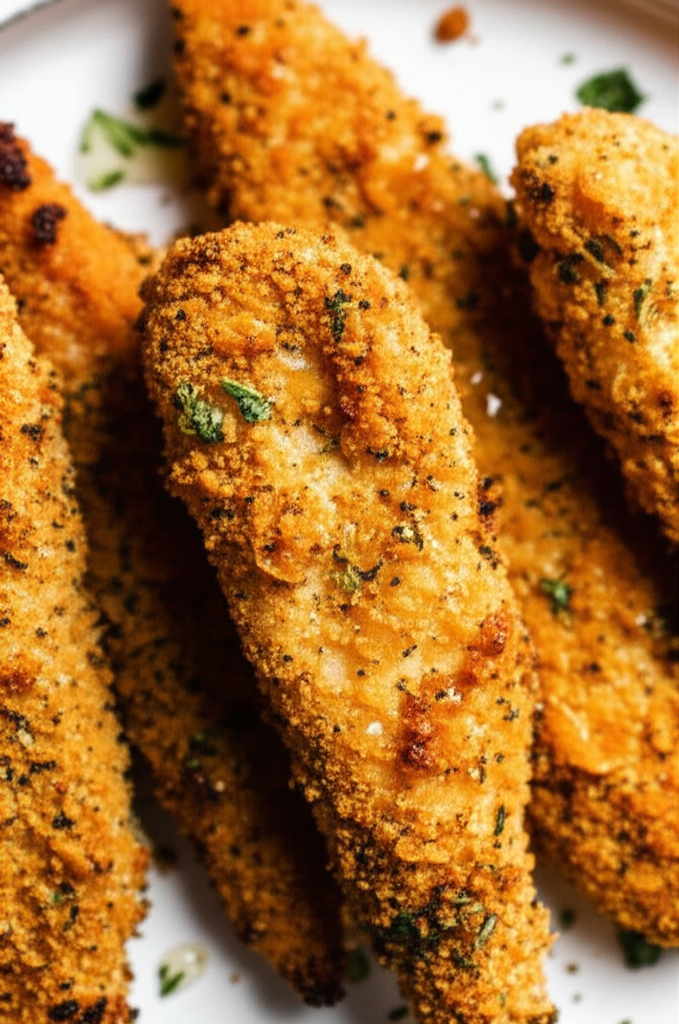
Classic Baked Chicken Fingers
Crispy, golden chicken fingers baked to perfection with a tangy tomato sauce. Light yet flavorful, perfect for a family dinner.
🥘Ingredients
- 1 lb boneless, skinless chicken breasts or tenders
- 1 egg
- 1 cup all-purpose flour
- 1 tsp paprika
- 1 tsp garlic powder
- ½ tsp onion powder
- ½ tsp salt
- ¼ tsp black pepper
- ½ cup mayonnaise
- ¼ cup ketchup
- 2 tbsp apple cider vinegar
- 1 tbsp honey
- 1 tsp Dijon mustard
- 1 tsp Worcestershire sauce
👨🍳Directions
-
1 Preheat oven to 425°F (220°C). Line a baking sheet with parchment paper.
-
2 Cut chicken into 6 equal strips. Season with salt, pepper, garlic powder, onion powder, and paprika.
-
3 In a shallow bowl, beat the egg. In another bowl, mix flour with ½ tsp salt.
-
4 Dredge each chicken strip in the egg, then coat thoroughly in the flour mixture.
-
5 Place chicken strips on the baking sheet in a single layer. Bake for 15 minutes.
-
6 Flip chicken strips and bake for another 10-12 minutes until golden and crispy.
-
7 Mix sauce ingredients in a bowl. Serve chicken fingers with sauce on the side.
🔧Equipment
- Mixing bowls
- Baking sheet
- Oven
- Knife and cutting board
- Measuring cups and spoons
- Fork or chicken tenderizer
📊Nutrition Facts (per serving)
📝Notes
Watch Video Of How Classic Baked Chicken Fingers Works
This baked chicken fingers recipe is always a crowd-pleaser because they stay crispy and juicy without needing much fuss, which is perfect for busy family gatherings. Whether it’s a weekend cookout or a quick weeknight meal, these fingers are easy to prep ahead and reheat, so you can focus on other things while they cook up perfectly every time. Plus, they’re simple enough for kids to help with, making it a fun and stress-free way to get everyone involved in the kitchen.
❓ Frequently Asked Questions About Baked Chicken Fingers
1. What are the best ingredients to use for homemade baked chicken fingers that keep them crispy?
To achieve the best crispy texture, use all-purpose flour (or a mix of all-purpose and whole wheat for added fiber), buttermilk (or plain milk with a splash of vinegar for tang) as a batter, and egg whites for extra crispiness. For the breading, use panko breadcrumbs mixed with a little cornstarch or baking powder to ensure a golden, crunchy crust. Avoid overcrowding the baking sheet to prevent steaming instead of frying.
—
2. Why do my baked chicken fingers turn out soggy instead of crispy?
Soggy baked chicken fingers usually happen due to overcrowding the pan (which causes steam buildup), using too much batter, or not pre-cooking the chicken properly. To fix this, cut the chicken into even-sized pieces (about 1-inch thick), pat them completely dry with paper towels, and bake in two batches at 425°F (220°C) for 12–15 minutes, flipping halfway. Adding a light spray of oil on the baking sheet can also help prevent sticking.
—
3. Can I use frozen chicken tenders instead of fresh-cut chicken for baking?
Yes, you can use frozen chicken tenders, but adjust the baking time slightly. Thaw them under cold water (not at room temperature) or microwave for 30 seconds, then pat dry. Bake at 425°F (220°C) for 12–15 minutes, flipping once, until golden and cooked through (internal temp should reach 165°F/74°C). Avoid overcooking to prevent dryness.
—
4. How do I make sure my baked chicken fingers stay juicy inside?
For juicy baked chicken fingers, don’t overcook—pull them out when the internal temp reaches 160–165°F (71–74°C). Instead of frying, baste with melted butter or oil during the last 2–3 minutes of baking. Another trick is to marinate the chicken in a light yogurt or buttermilk mixture for 30 minutes to 2 hours before breading to keep moisture in. Avoid stuffing them too thickly with batter to prevent sogginess.
—
5. What’s the best way to store and reheat leftover baked chicken fingers?
Store leftover baked chicken fingers in an airtight container in the fridge for up to 3–4 days or freeze for up to 3 months. To reheat, air-fry at 350°F (175°C) for 3–4 minutes (for crispiness) or bake at 375°F (190°C) for 5–7 minutes, flipping halfway. For extra crispiness, toss in 1–2 tbsp of oil before reheating. Avoid microwaving directly—it can make them soggy.
