
chicken and peanut butter recipe

The Best chicken and peanut butter recipe
Chicken and peanut butter sandwiches have been a staple in our house since I first discovered them years ago. There’s something about the simple, satisfying combination that makes them feel both cozy and special, no matter the occasion. It’s that kind of recipe that doesn’t need to be fancy—just good, wholesome ingredients that hold up well whether you’re making it for a quick lunch or a light dinner after a long day. My kids, especially my little one who’s a picky eater, will often demand it, and honestly, I don’t blame them. The way the peanut butter clings to the chicken, the slight crunch of the bread, and the rich, nutty flavor make it feel indulgent without being heavy. It’s the kind of meal that’s easy to customize—add a little honey, a sprinkle of salt, or even some sliced banana if you want to make it a little sweeter. I love that it’s flexible enough for everyday eating but still feels like a treat when we make it for a family gathering or a weekend brunch.
Health-wise, this recipe is surprisingly balanced. Peanut butter is packed with protein and healthy fats, which help keep us full longer, and the chicken provides lean protein for muscle maintenance. The whole-grain bread adds fiber, which aids digestion and keeps things moving smoothly. I’ve even found that my kids eat more vegetables when they’re paired with this sandwich—it’s a sneaky way to get nutrients in without them even realizing it. Plus, it’s a great way to use up leftover chicken if we’ve had a big dinner, turning leftovers into something fresh and delicious. My husband and I have been known to make extra batches on weekends, and by the time Monday rolls around, we’re all ready for a quick, no-fuss meal. It’s the kind of recipe that feels like a comfort, but it’s also practical—no last-minute stress, no complicated steps, just good food that everyone in the family enjoys.
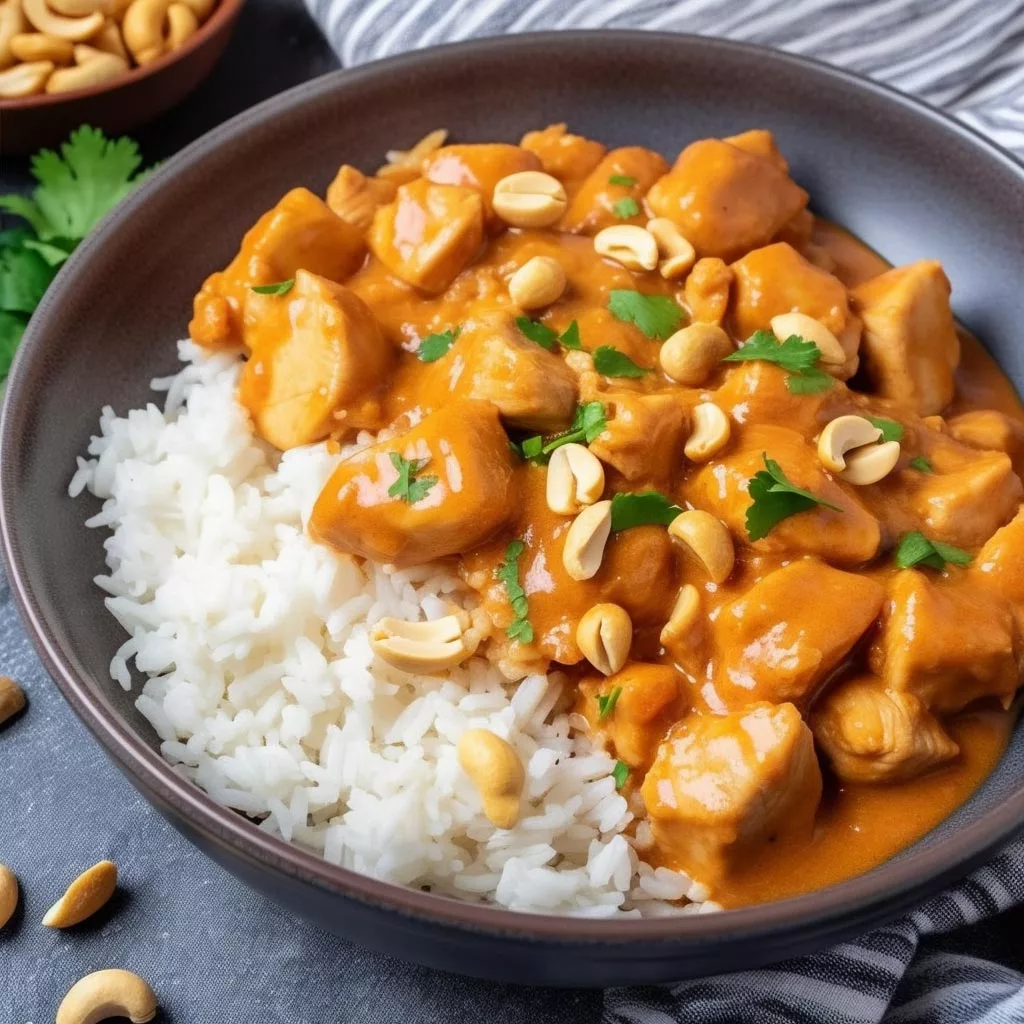
Crispy Chicken with Peanut Butter Glaze
A delightful fusion of tender chicken and a rich peanut butter glaze, offering a perfect balance of savory and sweet flavors. This dish is ideal for a quick and satisfying meal.
🥘Ingredients
- 4 boneless, skinless chicken breasts
- 1 tbsp olive oil
- 1 tsp garlic powder
- 1 tsp paprika
- ½ tsp salt
- ½ tsp black pepper
- ½ cup natural peanut butter
- ¼ cup soy sauce
- 2 tbsp honey
- 1 tbsp rice vinegar
- 1 clove garlic, minced
- 1 tsp grated ginger
- 1 tsp sriracha (optional)
- 1 tbsp sesame oil
- 1 tbsp chopped peanuts
- 1 tbsp chopped cilantro
- Red pepper flakes (optional)
👨🍳Directions
-
1 Preheat oven to 400°F (200°C). Line a baking sheet with parchment paper.
-
2 Pat chicken breasts dry with a paper towel. Rub each with olive oil, then sprinkle with garlic powder, paprika, salt, and pepper. Place on the baking sheet.
-
3 Bake for 18-20 minutes or until internal temperature reaches 165°F (74°C). Let rest for 5 minutes before slicing.
-
4 In a small bowl, mix peanut butter, soy sauce, honey, rice vinegar, minced garlic, grated ginger, and sriracha (if using). Stir in sesame oil.
-
5 Drizzle the peanut butter glaze over sliced chicken and let it sit for 2-3 minutes to coat.
-
6 Garnish with chopped peanuts, cilantro, and red pepper flakes (if desired). Serve warm.
🔧Equipment
- Mixing bowls
- Cutting board
- Baking sheet
- Oven
- Food processor (optional)
- Spice grinders or small grater
📊Nutrition Facts (per serving)
📝Notes
Watch Video Of How Crispy Chicken with Peanut Butter Glaze Works
This peanut butter chicken recipe is always a crowd-pleaser because it’s simple enough to whip up in a pinch but feels special enough for bigger gatherings. It’s the kind of dish that keeps everyone happy—whether it’s a quick weeknight meal or a make-ahead option for a holiday spread—because the flavors are rich and comforting without needing fancy ingredients. Families love it because it’s adaptable, filling, and never disappoints.
❓ Frequently Asked Questions About Crispy Chicken with Peanut Butter Glaze
1. How long should I cook the chicken and peanut butter mixture for to ensure it’s fully cooked and safe to eat? To ensure the chicken is fully cooked and safe to consume, cook it until it reaches an internal temperature of 165°F (74°C). Once the chicken is added to the peanut butter mixture, cook it on low heat for about 15–20 minutes, stirring occasionally, until the sauce thickens and the chicken is tender. Avoid overcooking to prevent drying it out.
—
2. Can I use pre-cooked or rotisserie chicken in this recipe instead of raw chicken? Yes, you can absolutely use pre-cooked or rotisserie chicken! Simply shred or chop it into bite-sized pieces before mixing it into the peanut sauce. This saves time and ensures even cooking. Just make sure to remove any excess skin or bones if present.
—
3. What are some good substitutions for regular peanut butter in this dish? If you don’t have regular peanut butter, you can try these substitutes: – Natural peanut butter (if you prefer less sugar and more natural flavors) – Almond butter (for a nutty twist) – Cashew butter (a creamy alternative) – Sunflower seed butter (for a nut-free option) – Peanut-free sauce (blend roasted peanuts with coconut milk, soy sauce, and garlic for a similar texture)
Adjust the liquid (like soy sauce or coconut milk) slightly if needed to reach the right consistency.
—
4. How can I make this peanut chicken dish extra creamy or richer? To enhance the creaminess of your peanut chicken dish, try these tips: – Add 1–2 tbsp of coconut milk or light coconut cream for extra richness. – Stir in 1 tsp of honey or brown sugar to balance the flavors. – Mix in 1 tbsp of Greek yogurt or sour cream for a tangy twist. – For a thicker sauce, reduce the liquid by simmering the mixture slightly before adding the chicken. – If using a creamy peanut butter, blend it smooth for a silkier texture.
—
5. Can I freeze this peanut chicken dish for later, and how should I reheat it? Yes, you can freeze this dish! Portion it into airtight containers or freezer bags and freeze for up to 3 months. To reheat: – Microwave: Thaw in the fridge overnight, then reheat in 30-second bursts, stirring between each, until hot. – Stovetop: Thaw and warm gently on low heat, stirring frequently to prevent burning. – Oven: Thaw, then bake at 350°F (175°C) for 20–25 minutes, covering with foil if needed. – Air Fryer: Thaw and reheat at 300°F (150°C) for 5–7 minutes, stirring halfway.
