
dutch oven chicken breast recipe

- The Best dutch oven chicken breast recipe
- One-Pan Dutch Oven Chicken Breast with Garlic Tomato Sauce
- 🥘Ingredients
- 👨🍳Directions
- 🔧Equipment
- 📊Nutrition Facts (per serving)
- 📝Notes
- Watch Video Of How One-Pan Dutch Oven Chicken Breast with Garlic Tomato Sauce Works
- ❓ Frequently Asked Questions About One-Pan Dutch Oven Chicken Breast with Garlic Tomato Sauce
The Best dutch oven chicken breast recipe
Oh, this Dutch oven chicken breast recipe is one of those things that just feels like a no-brainer in my kitchen. I’ve been making it for years, and it’s always a hit—whether it’s for a quick weeknight dinner or a special occasion where we want something hearty but still manageable. Chicken breast is lean and versatile, and when you slow-cook it in a Dutch oven with a little liquid and some aromatic spices, it becomes tender, flavorful, and easy to eat. My kids—especially my picky little ones—love it because it’s not too dry, not too mushy, and it’s always got a little something in it, whether that’s herbs, garlic, or a hint of lemon. It’s that kind of recipe that feels like a hug for your taste buds.
What I love most about this dish is how it’s so adaptable. You can throw in whatever veggies you have on hand—peas, carrots, zucchini, or even just a simple onion and bell pepper—and it just works. It’s not fancy, but it’s never boring. And because it’s cooked in one pot, there’s no stress about overcooking or underseasoning. It’s the kind of meal that makes you feel like you’re doing something good for your family without overcomplicating things. Plus, chicken breast is a great source of protein, and when you pair it with whole grains or roasted veggies, it’s a balanced meal that’s easy on the waistline. It’s not just dinner—it’s a way to eat well without feeling like you’re missing out on anything fun. And honestly, my husband always says it’s the only thing that makes him forget he’s eating chicken for dinner.
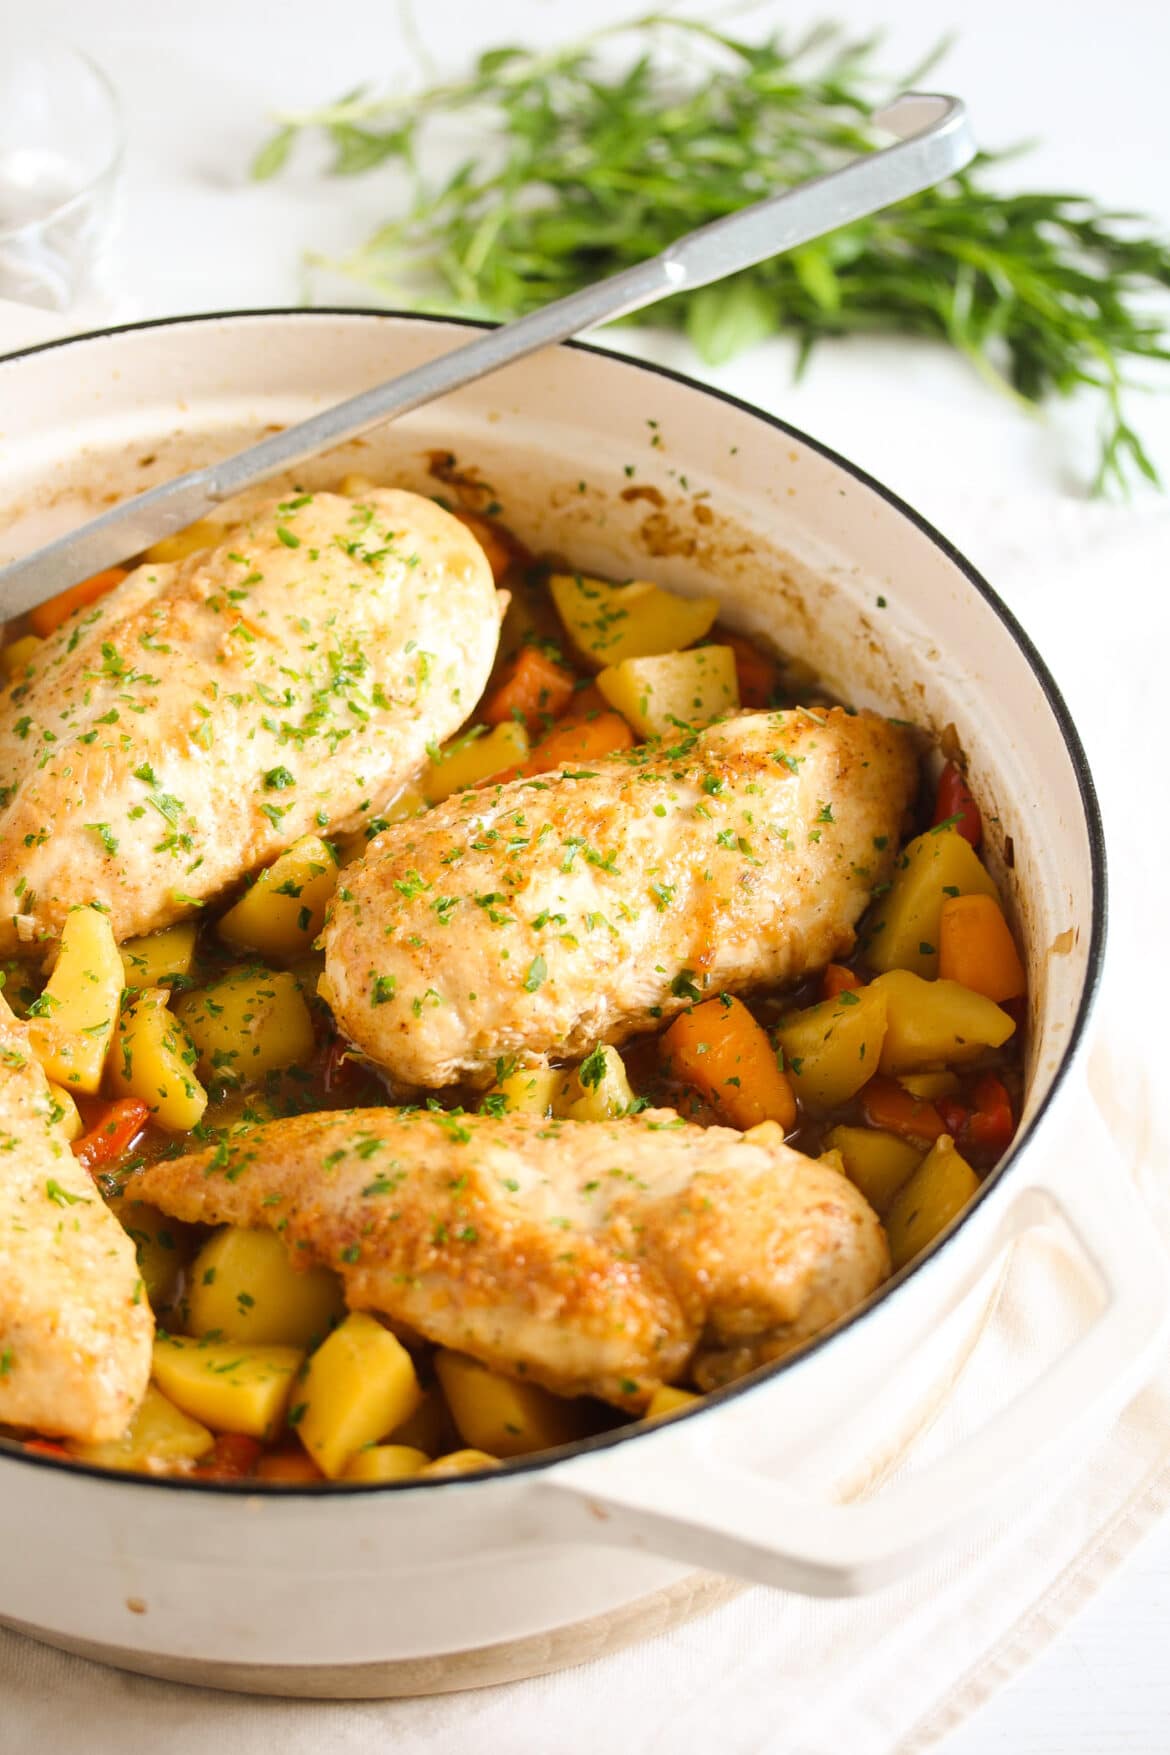
One-Pan Dutch Oven Chicken Breast with Garlic Tomato Sauce
A flavorful, easy-to-make dish featuring tender chicken breasts baked in a Dutch oven with a rich garlic tomato sauce. Perfect for a quick weeknight meal with minimal cleanup.
🥘Ingredients
- 4 boneless, skinless chicken breasts
- 2 tbsp olive oil
- 1 tsp paprika
- 1 tsp dried oregano
- ½ tsp garlic powder
- ½ tsp salt
- ¼ tsp black pepper
- 1 cup (240ml) tomato sauce
- 3 cloves garlic, minced
- 1 tbsp tomato paste
- 1 tsp dried basil
- ½ tsp red pepper flakes (optional)
- 1 cup (240ml) chicken broth
- 1 tbsp balsamic vinegar
- 1 tbsp honey
- Salt and pepper to taste
- 1 cup (150g) diced bell peppers
- 1 cup (150g) cherry tomatoes, halved
- 1 small onion, diced
👨🍳Directions
-
1 Preheat your oven to 400°F (200°C). In a mixing bowl, combine olive oil, paprika, oregano, garlic powder, salt, and black pepper. Rub this mixture all over the chicken breasts.
-
2 Place the chicken breasts in a Dutch oven, skin-side up. Pour the tomato sauce into the Dutch oven, ensuring the chicken is fully submerged. Add minced garlic, tomato paste, dried basil, red pepper flakes, and chicken broth. Stir well to combine.
-
3 Add optional ingredients like diced bell peppers, cherry tomatoes, and onion if using. Cover the Dutch oven with the lid and bake for 25 minutes.
-
4 Remove the lid and bake for an additional 10-15 minutes, or until the chicken reaches an internal temperature of 165°F (74°C). Stir the sauce occasionally for even cooking.
-
5 Add balsamic vinegar and honey to the sauce. Stir well and let it simmer for 2-3 minutes until slightly thickened. Adjust seasoning with salt and pepper if needed.
-
6 Let the chicken rest for 5 minutes before serving. Garnish with fresh parsley if desired.
🔧Equipment
- Dutch oven
- Mixing bowls
- Knife and cutting board
- Measuring cups and spoons
- Wooden spoon
- Oven
📊Nutrition Facts (per serving)
📝Notes
Watch Video Of How One-Pan Dutch Oven Chicken Breast with Garlic Tomato Sauce Works
This Dutch oven chicken breast recipe is always a solid choice for any gathering because it’s foolproof—no fussing with fancy techniques, just tender meat and flavorful results that hold up well whether you’re serving it with mashed potatoes, roasted veggies, or just a simple green salad. It’s perfect for busy weeknights or family dinners because it cooks evenly and stays juicy, so you don’t have to worry about dry chicken or last-minute stress. Plus, it’s versatile enough to work in a pinch, making it a reliable staple for any meal.
❓ Frequently Asked Questions About One-Pan Dutch Oven Chicken Breast with Garlic Tomato Sauce
What is the best way to prepare chicken breasts in a Dutch oven for maximum tenderness?
The best way to prepare chicken breasts in a Dutch oven for maximum tenderness is by first marinating them in a mixture of olive oil, garlic, lemon juice, salt, pepper, and herbs like rosemary or thyme for at least 30 minutes (or overnight for deeper flavor). Before cooking, pat the chicken dry to ensure a good sear. Sear the chicken breasts in a hot Dutch oven with a little oil for about 3-4 minutes per side until golden brown. Then, add a small amount of broth or water, cover, and simmer on low heat for 15-20 minutes until the internal temperature reaches 165°F (74°C) internally.
—
How do I ensure my Dutch oven chicken breasts stay moist and flavorful?
To keep your Dutch oven chicken breasts moist and flavorful, follow these tips: use a small amount of broth, water, or a light sauce (like a mix of chicken broth, butter, and herbs) to create a steamy environment. Avoid overcrowding the Dutch oven, as this can steam the chicken instead of cooking it properly. Use a meat thermometer to ensure the internal temperature reaches 165°F (74°C) without overcooking. Additionally, basting the chicken with melted butter, garlic, or lemon juice halfway through cooking adds moisture and extra flavor. Finally, let the chicken rest for 5-10 minutes before serving to retain juices.
—
Can I substitute chicken breasts with other proteins in this Dutch oven recipe?
Yes, you can substitute chicken breasts with other proteins, but the cooking time and technique may vary. For thick-cut pork chops, cook them similarly (sear first, then simmer) but reduce the cooking time to 12-15 minutes. Thin-cut pork or chicken thighs can be cooked faster (10-12 minutes) since they cook more evenly. Shrimp works well if you cook them in batches (sear for 1-2 minutes per side, then add to the Dutch oven and simmer for 2-3 minutes). For steaks (like sirloin or flank), sear them first and cook directly in the Dutch oven without adding liquid, ensuring they reach the desired doneness (125°F-130°F for medium-rare). Always adjust cooking times based on thickness and protein type.
—
What ingredients should I include to enhance the flavor of the Dutch oven chicken breasts?
To enhance the flavor, include these key ingredients: – Herbs: Fresh rosemary, thyme, or parsley (or dried versions) for depth. – Aromatics: Garlic (minced or powdered), shallots, or onion (diced and sautéed). – Acidity: Lemon juice, white wine vinegar, or a splash of red wine to brighten the dish. – Umami boosters: Soy sauce, Worcestershire sauce, or a dash of fish sauce for savory richness. – Butter & oil: Melted butter or olive oil for richness and moisture. – Seasonings: Salt (don’t skip!), black pepper, smoked paprika, or a pinch of cayenne for heat. – Liquid base: Chicken broth, beef broth, or a light tomato sauce (like a simple tomato paste + garlic blend). – Optional add-ins: Carrots, celery, or bell peppers for extra veggies, or a sprinkle of cheese (like Gruyère or Parmesan) before serving.
Avoid overcomplicating it—simplicity often works best, but these ingredients can elevate the dish significantly.
—
Why does my Dutch oven chicken breast turn out dry or rubbery, and how can I fix it?
Your Dutch oven chicken breasts may turn out dry or rubbery due to these common mistakes and fixes: 1. Overcooking: Cutting the chicken too early before reaching 165°F (74°C). Fix: Use a meat thermometer and cook until internal temp reaches the target (165°F for fully cooked chicken). 2. Not resting: Skipping the 5-10 minute rest time after cooking. Fix: Let the chicken rest under a foil tent to retain juices before slicing or serving. 3. Poor marinating or drying: Not marinating or patting the chicken dry before cooking. Fix: Marinate for at least 30 minutes (or overnight) and always pat dry with paper towels before searing. 4. Overcrowding the pot: Adding too much liquid or too many ingredients. Fix: Use a small amount of broth or water, and avoid overcrowding the Dutch oven. 5. Cooking at high heat: Using too much heat or a pot that’s too small. Fix: Sear the chicken in a hot Dutch oven first, then reduce heat to low and cover to steam gently. 6. Using frozen chicken: Thawing slowly or improperly. Fix: Thaw chicken overnight in the fridge, then pat dry before cooking. Pro tip: If your chicken is already dry, you can slice it thinly and toss it with a sauce (like a pan sauce with butter, garlic, and herbs) to rehydrate and add flavor.
