panko chicken breast recipe

- The Best panko chicken breast recipe
- Crispy Panko Chicken Breast with Garlic Tomato Sauce
- 🥘Ingredients
- 👨🍳Directions
- 🔧Equipment
- 📊Nutrition Facts (per serving)
- 📝Notes
- Watch Video Of How Crispy Panko Chicken Breast with Garlic Tomato Sauce Works
- ❓ Frequently Asked Questions About Crispy Panko Chicken Breast with Garlic Tomato Sauce
The Best panko chicken breast recipe
Oh, this panko chicken breast recipe is one of those things that just makes everything better. I’ve been making it since my kids were little, and honestly, it’s become a staple in our house—both for casual weeknight dinners and when we’re hosting family or friends. The texture is so crispy on the outside while staying juicy inside, and it’s got that perfect balance of flavor without being too heavy. My kids swear by it, especially when it’s paired with a simple green salad or some roasted veggies. It’s that kind of dish that feels special but isn’t a big deal to prepare, which is why I always keep it in my rotation.
I love this recipe because it’s so versatile. You can serve it with everything from mac and cheese to a fresh garden salad or even just a side of steamed broccoli. It’s great for meal prep too—cook a big batch on Sunday and have it ready for lunches or quick dinners all week. Plus, it’s a healthier take on fried chicken without sacrificing that satisfying crunch. My husband and I both appreciate that it’s packed with protein, which keeps us full longer, and the panko coating adds a nice fiber boost too. It’s not just a recipe—it’s a way to make simple things feel extra delicious, and that’s what matters most to me.
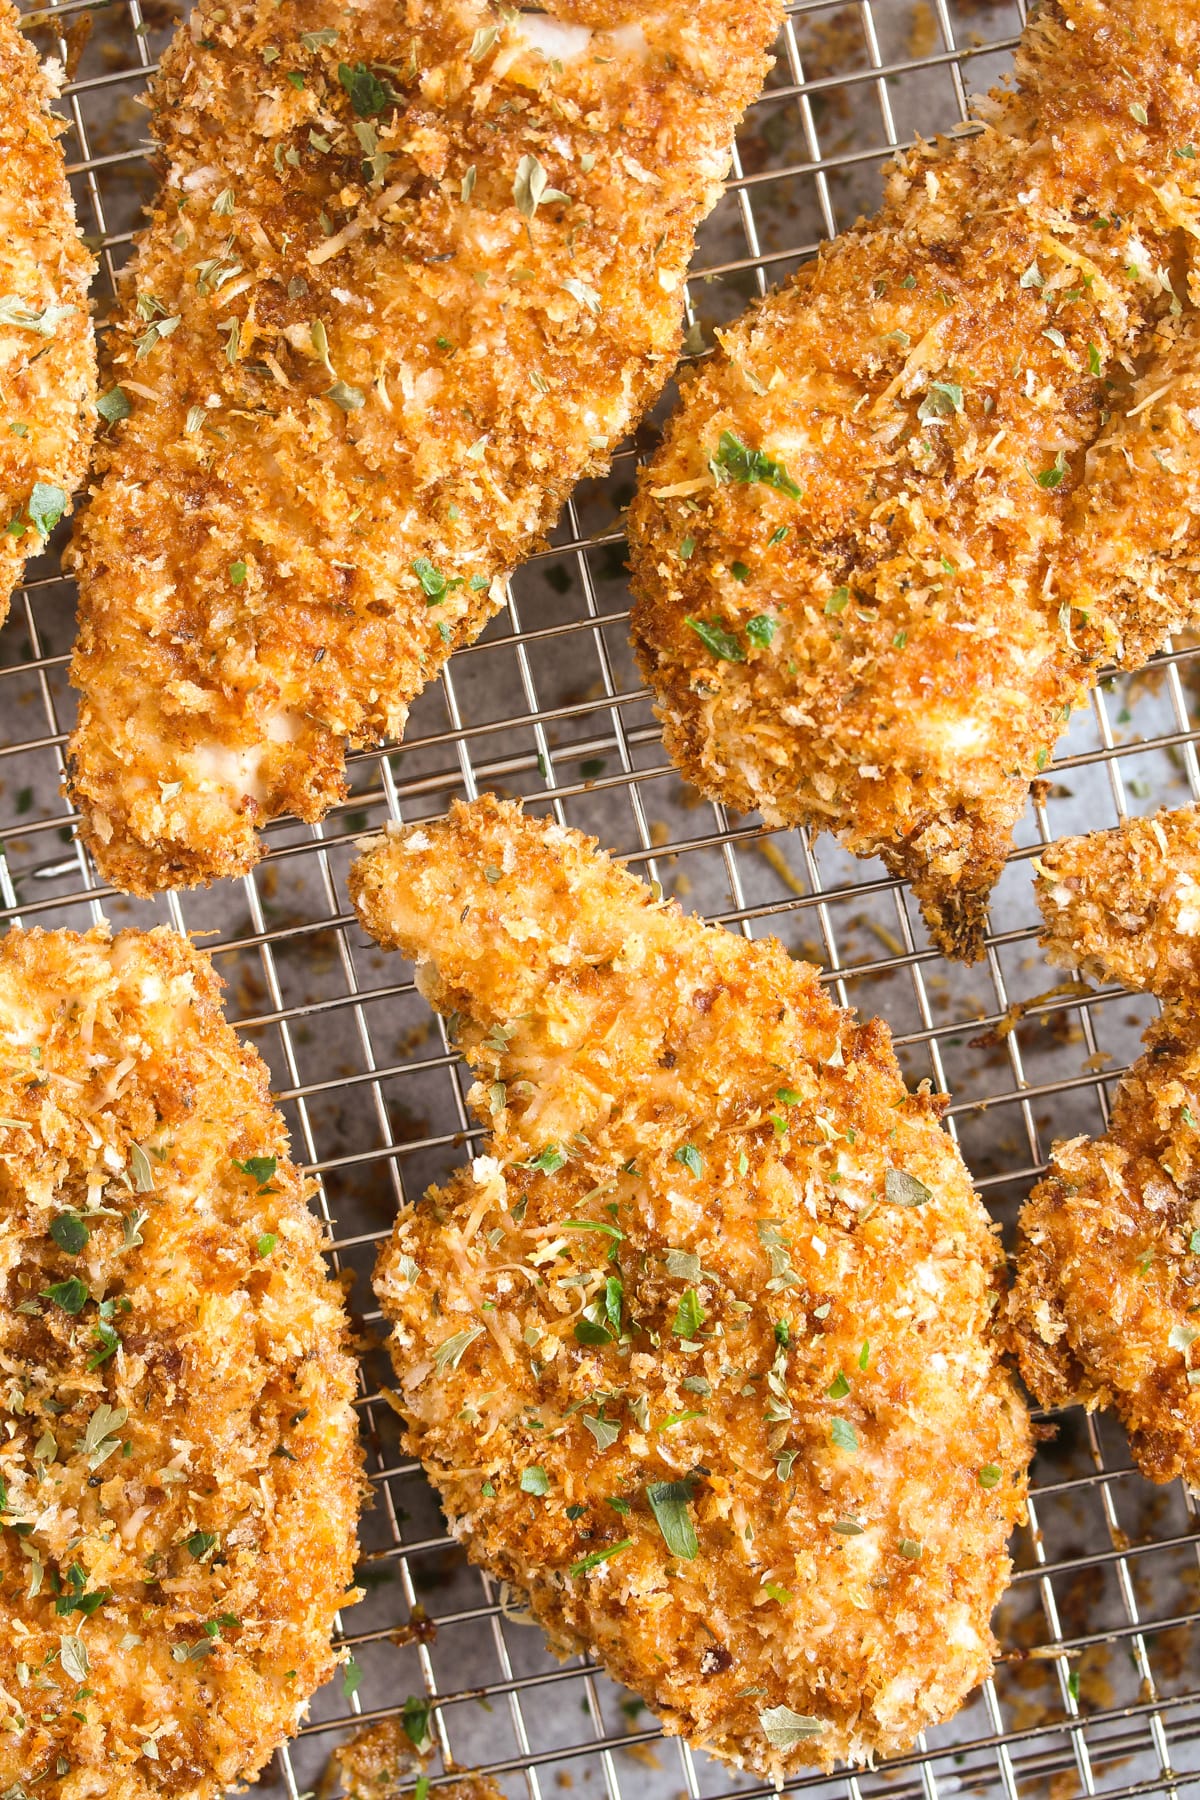
Crispy Panko Chicken Breast with Garlic Tomato Sauce
A delicious and crispy baked chicken breast coated in panko breadcrumbs, paired with a rich garlic tomato sauce for a satisfying meal. This recipe is a must-try for any occasion.
🥘Ingredients
- 4 boneless, skinless chicken breasts (6 oz each)
- 1 cup panko breadcrumbs
- 1 egg
- 1 tbsp olive oil
- 1 tsp garlic powder
- ½ tsp paprika
- 1 cup tomato sauce
- 3 cloves garlic, minced
- 1 tbsp butter
- ½ cup heavy cream
- Salt and pepper to taste
- 1 tbsp fresh parsley, chopped
👨🍳Directions
-
1 Preheat oven to 425°F (220°C). Line a baking sheet with parchment paper.
-
2 In a shallow bowl, whisk together egg and olive oil. In another bowl, mix panko, garlic powder, and paprika.
-
3 Place chicken breasts in the egg mixture, coating each breast evenly. Remove excess liquid, then roll in panko mixture until fully coated.
-
4 Place coated chicken on the baking sheet and bake for 20 minutes. Flip chicken and bake for another 15 minutes, or until internal temperature reaches 165°F (74°C).
-
5 While chicken bakes, melt butter in a pan over medium heat. Add minced garlic and sauté for 30 seconds. Pour in tomato sauce and heavy cream, simmer for 5 minutes. Season with salt and pepper, then stir in chopped parsley.
-
6 Serve chicken with garlic tomato sauce on top or alongside.
-
undefined undefined
-
undefined undefined
-
undefined undefined
-
undefined undefined
🔧Equipment
- Mixing bowls
- Baking sheet
- Oven
- Knife and cutting board
- Measuring cups
📊Nutrition Facts (per serving)
📝Notes
Watch Video Of How Crispy Panko Chicken Breast with Garlic Tomato Sauce Works
This panko chicken breast recipe is always a crowd-pleaser because it’s simple enough to make ahead and still tastes great, especially when you’re hosting a family dinner or potluck. The crispy coating holds up well, making it perfect for serving with sides like roasted veggies or a fresh salad, and it’s versatile enough to work for weeknight meals too. No fuss, just delicious flavor that everyone will want seconds for.
❓ Frequently Asked Questions About Crispy Panko Chicken Breast with Garlic Tomato Sauce
1. What is the difference between panko breadcrumbs and regular breadcrumbs in this recipe? Panko breadcrumbs are a lighter, airier alternative to regular breadcrumbs. They have a crispier texture and absorb less moisture, which makes them ideal for coating chicken breasts. Panko also has a slightly toasted flavor, enhancing the overall taste of the dish. Regular breadcrumbs can make the coating denser and less crispy.
2. Can I use frozen chicken breasts for this recipe? Yes, you can use frozen chicken breasts, but make sure to thaw them completely in the refrigerator before cooking. Thawing helps ensure even cooking and prevents the chicken from drying out. Pat the breasts dry with a paper towel before coating to help the panko adhere better.
3. How do I ensure the panko chicken breast stays juicy while maintaining a crispy coating? To keep the chicken juicy, avoid overcooking it. Use a meat thermometer to check the internal temperature—chicken should reach 165°F (74°C) in the thickest part. For extra juiciness, you can also let the chicken rest for 5-10 minutes after cooking before slicing. Additionally, lightly coating the chicken with a beaten egg or milk before panko can help retain moisture.
4. What can I serve with panko chicken breast to complement the dish? Panko chicken breast pairs well with a variety of sides. Some great options include: – Freshly made coleslaw or a simple salad with a light vinaigrette – Roasted or steamed vegetables like green beans, asparagus, or broccoli – Mashed potatoes or garlic bread – A creamy dipping sauce like ranch, blue cheese, or a tangy honey mustard
5. Can I make this recipe ahead of time and reheat it? While you can prep the panko coating in advance, it’s best to cook the chicken fresh to maintain the crispiness. If you must prepare the chicken ahead, store the coated breasts in an airtight container in the refrigerator for up to 24 hours. Reheat in a 375°F (190°C) oven for 10-15 minutes until hot, or pan-fry until crispy again. Avoid freezing the fully cooked chicken to prevent the coating from becoming soggy.